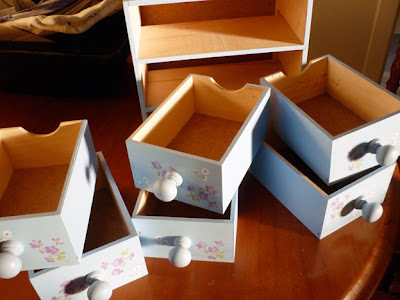
I have had this craftwood set of drawers for about 10 years. I think I originally got it from
Ikea and switched the drawers back to front and painted it to match my
Laura Ashley bed linen {back in the day} and added some knobs.
As I got sick of looking at it about 9 years ago I thought it was about time for a makeover. I cover all sorts of things like this with paper and this is they way I have found works best for me........
I have chosen my paper, a good way to use up scrapbooking or wrapping paper that you love.
Measure each surface of the drawers and frame that you need to cover and cut out
those sizes from your paper selection. Then glue to the surfaces, I use Mod Podge or PVA. This is sometimes a bit tricky especially on larger surface areas. It depends on the kind of paper you use, I will admit I got a few bubbly bits. Try to smooth it out with a cloth as you go.
When it's covered and the glue is dry you can trim, sand and varnish.
I am far from accurate or patient so I always get bits of paper sticking out which have to
be trimmed with a knife.
Next I sand the edges to make it nice and smooth and flush. Don't go crazy or you will rip the paper too much. However having said that, a nice distressed edge looks good too. Use a medium then a very fine grain of sandpaper. This should just be a quick sanding.
This bit is the most important so PAY ATTENTION. You have to go buy yourself some gelati so you can use the cup when you're finished to pour your varnish in to. Whatever you do, don't use a normal plastic container you already have lying around at home ~ it won't work!
Now to varnish - do two coats taking care with the edges so that your paper won't peel up at a later date. Any kind of water based craft varnish is fine, glossy is what I used here.
Wait till it dries before applying the second coat. When it's done your piece will be sealed and easy to clean, able to withstand knocks, ra ra ra.
Last step ~ add some pretty drawer pulls / knobs {mine used here were purchased from Ikea }
~ all done!


